
Install the app
How to install the app on iOS
Follow along with the video below to see how to install our site as a web app on your home screen.
Note: This feature may not be available in some browsers.
Vous utilisez un navigateur non à jour ou ancien. Il ne peut pas afficher ce site ou d'autres sites correctement.
Vous devez le mettre à jour ou utiliser un navigateur alternatif.
Vous devez le mettre à jour ou utiliser un navigateur alternatif.
Transformation...
- Auteur de la discussion salwa990
- Date de début
L
Lita007
Guest
Re : Transformation...
puré c troooooooooooooop booo comment vous faite ??????? trop trop booo :4-astonished: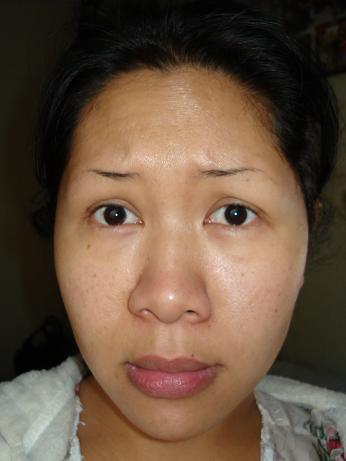
Naked eye
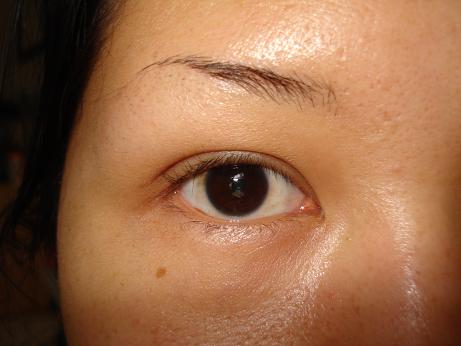
Putting in colored contacts (to me, this makes my eyes appear larger)
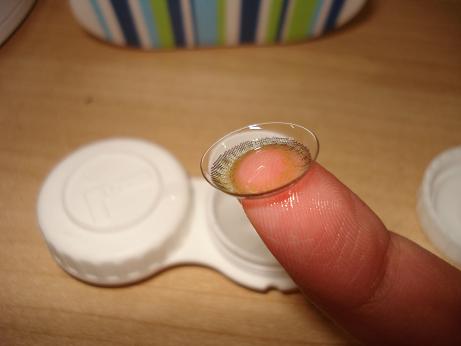
With the colored contacts on
Color in only the bald areas with brow pencil in Stud
Lightly dip #208 angled brow brush into eyeshadow. I use Coquette here
Color in the rest of my brows with eyeshadow.
Finished brows
Apply creme foundation to eyes as a primer using #194 taklon concealer brush for the smoothest application. Follow with dusting of translucent powder

Yay! No more icky redness and dark circles!!!
Wipe concealer brush clean and dampen with 1-2 drops of water-based mixing medium and swirl brush into Petalescent eyeshadow.
Apply all over eyes up to below browbone. This will provide the base for the rest of the eyeshadow application
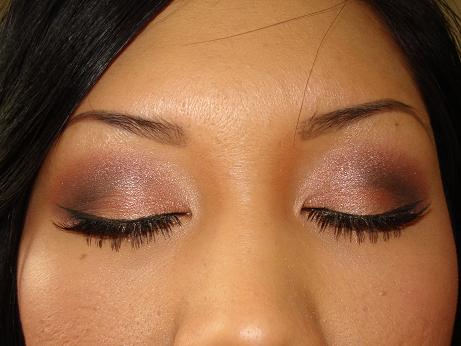
Apply Goldmine eyeshadow along upper lashline up to crease using #222 tapered blending brush
Apply Sketch eyeshadow to outer two-thirds of eye and contour into crease using #217 blending brush

Define crease and outer "V" lightly with Carbon eyeshadow using #219 pencil brush
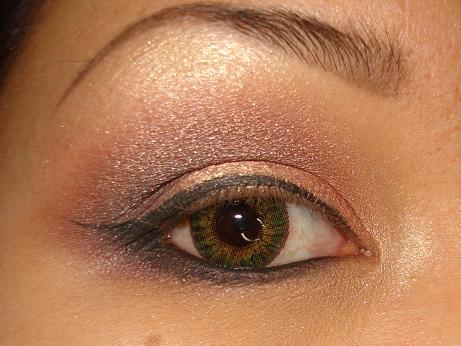
Finished eyeshadow application including Retrospeck applied to browbone and inner corner of eye using #222
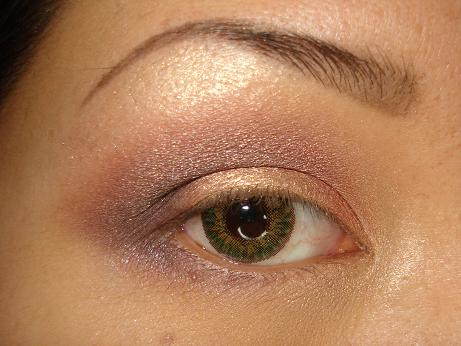
Apply fluidline in Blacktrack to upper lashline using #209 eyeliner brush. I extend line 1/4 inch past outer corner of eye to create "wing"
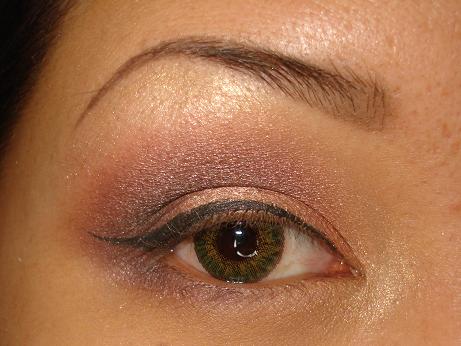
Finished upper eyeliner product
Now with the wetline completed using the same method
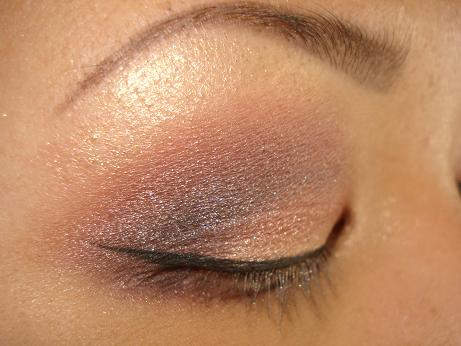
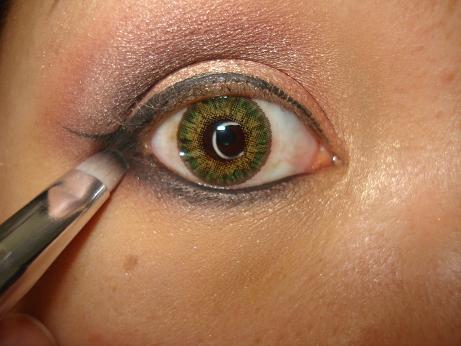
Again using #219 pencil brush, dip into Carbon eyeshadow and line along bottom lashline beneath wetline
Softly line along bottom lashline beneath wetline
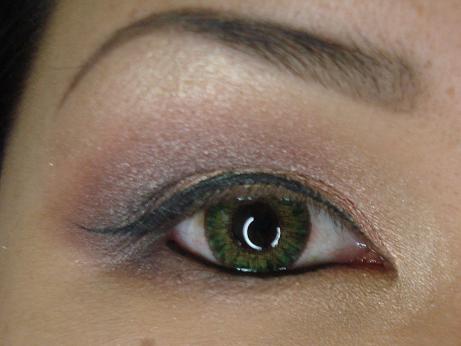
Finished eyeliner product. On to the lashes!!!
I use falsies most of the time. My natural lashes are pathetic. MAC's #7 are comparable to these Ardell Wispies.
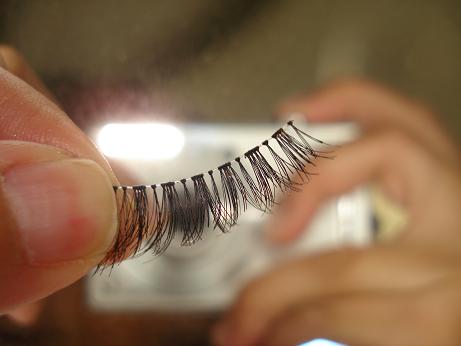
Apply DUO lash adhesive along lash strip. I use the blunt end of a sewing needle to apply. Bend lash strip back and forth for 15 secs. waiting for the adhesive to become tacky
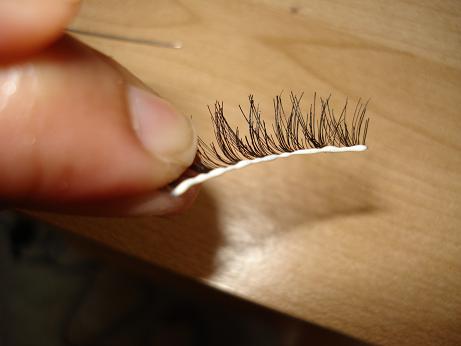
Now apply along lashline (THIS TAKES PRACTICE!). I hold the lash ends in place with my fingers until they're dry enough otherwise they'll lift out of place.
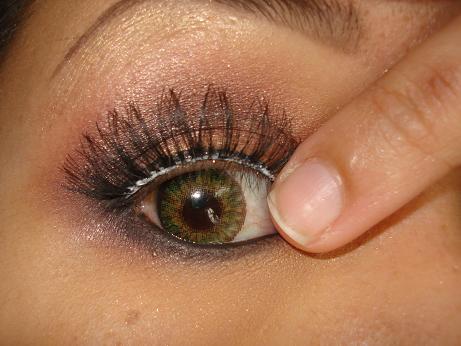
Finished lashes. My natural lashes can never look like this no matter how much mascara I use.
Just for fun I decided to put on bottom lashes applied the same way as upper lashes along the bottom lashline. These are placed beneath your natural lashes. I used MAC #25
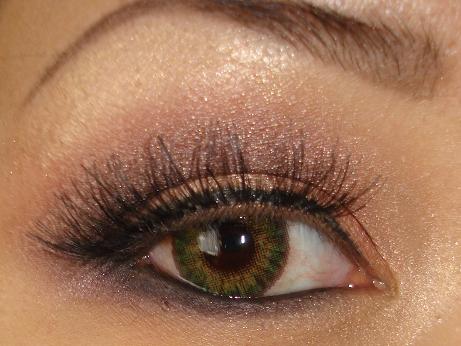
My finished eyes (*EDIT: I should've tightlined my upper lashline!!!)
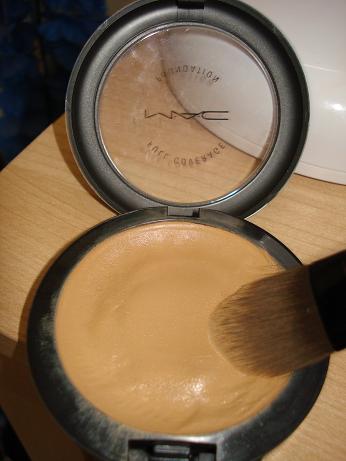
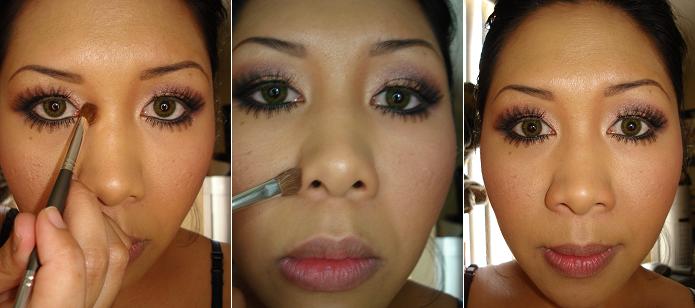
Foundation time! I apply extra spot coverage only where I need it using MAC's Full Coverage Foundation and #190 foundation brush.
My cheeks and around my nose where I have prominent redness, acne scarring, and enlarged pores is where I apply extra coverage only.
Next I use Everyday Minerals in the Intensive formula to the rest of my face
Buff it into skin with #182 kabuki/buffer brush using circular motions throughout the face for sheer coverage and to even out skin tone
A clear and even skin tone sure makes me happy!!!
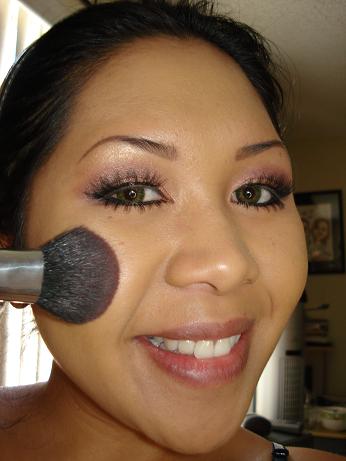
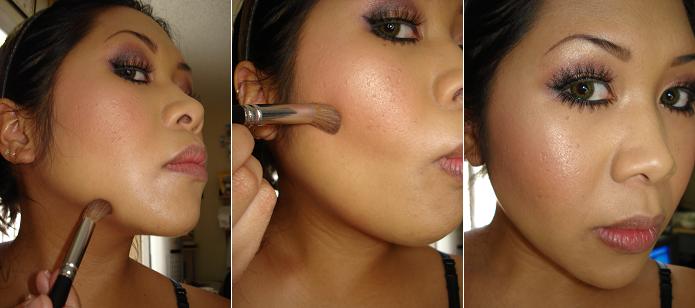
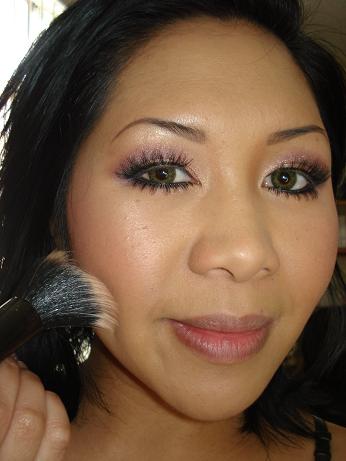
On to rosy cheeks. Dip #116 blush brush into powder blush. I use Milani's Powder Mosaic in Honey Kissed
SMILE! Apply to apples of cheeks sweeping up to temples
Next apply highlighter to the tops of the apples of the cheek with the #188 small duo fibre brush dipped into Mineral Skin Finish in Shimpagne as highlighter
Now I'm officially blushing and glowing!

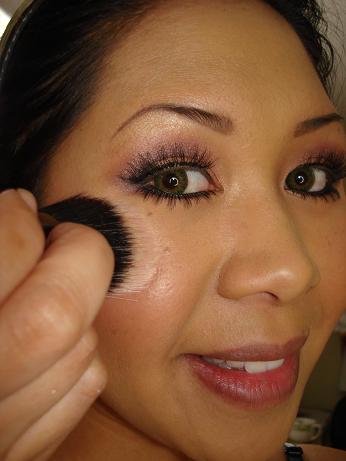
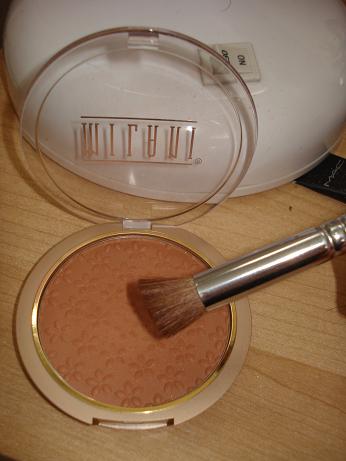
Facial contouring: I use a Milani's Powder Bronzer in Radiant several shades darker than my skin tone applying with angled contour brush such as the #168 large angled contour brush
Apply along jawline to minimize the "double-chin" look, and into hollows of my cheeks to simulate cheekbones
Next I contour my nose to define a bridge inbetween my eyes and narrow down my wide nose by applying contour to the sides of my nostrils. I use any regular medium eyeshadow brush for this. Remember to blend edges of all contouring well!!!
Apply Politely Pink lipstick sheerly onto lips. My lips are prominent enough on its own with or without coloring

Finally, set entire look with loose powder swirling #187 duo fibre brush into translucent powder

Apply all over face
Yay! I'm finally done!!!
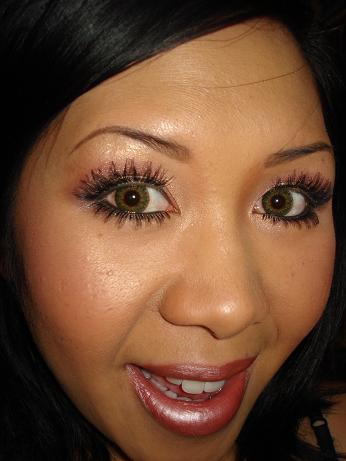
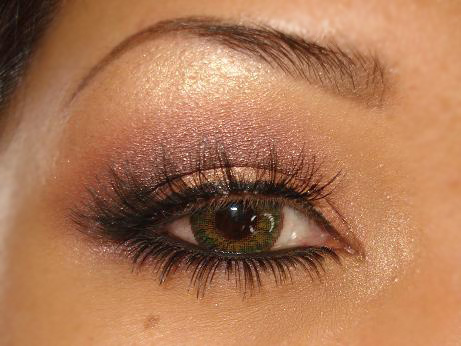
My finished pair of eyes
The classic "looking down" pose to show off my makeup application

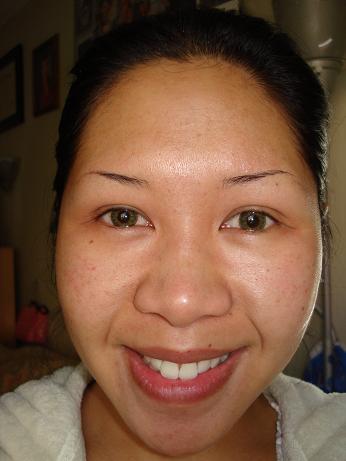
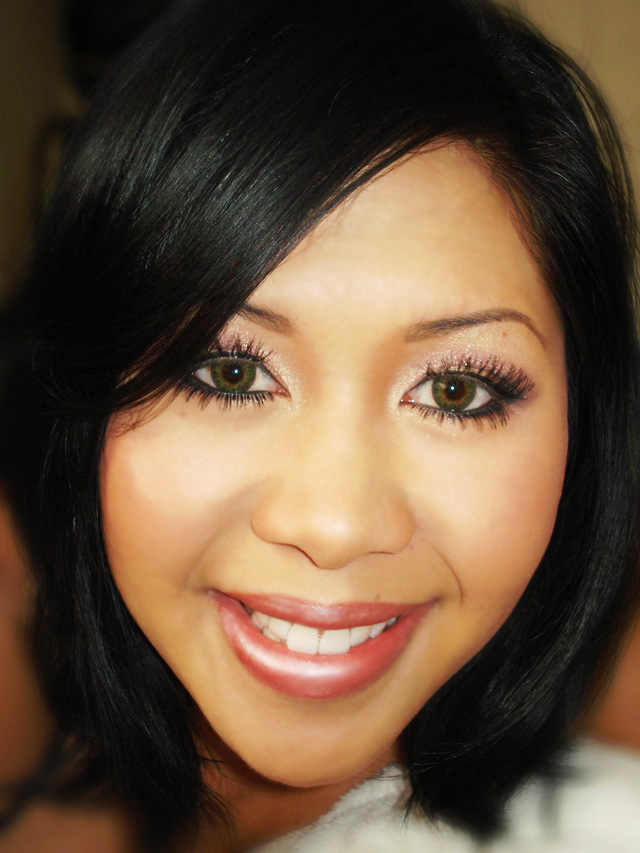
My finished face polished up with a bit of Photoshopping, hah! Scroll back to the top to see my previous hideousness!!!
 mais bluffant kan meme j'avoue!
canelle057
Confirmée
Re : Transformation...
franchement super je suis sur le cul comme on dit
et comme quoi le maquillage ça embellit vraiment une femme.
franchement super je suis sur le cul comme on dit
et comme quoi le maquillage ça embellit vraiment une femme.
latifa-san
Miss L Institut
Re : Transformation...
non non c'est normal parce que le fap à tendance à déborder ou il coule sur les joue donc pour éviter d'abîmer le teint on le fait après le maquillage des yeux
j'aime pas trop le maquillage des yeux je trouve qu'il y a trop de faux cils en haut et en bas ça fait tropppp sinon c'est vrai que la transformation est terrible
le fond de teint après le maquillage des yeux c'est bien la première fois que je vois ça ... et pourquoi ses sourcils sont-ils autant épilés?! lol
en tout cas le résultat est très bien
non non c'est normal parce que le fap à tendance à déborder ou il coule sur les joue donc pour éviter d'abîmer le teint on le fait après le maquillage des yeux
j'aime pas trop le maquillage des yeux je trouve qu'il y a trop de faux cils en haut et en bas ça fait tropppp sinon c'est vrai que la transformation est terrible
NBREAULT
Membre récent
Re : Transformation...
c'est de toute beauté, mais moi je n'aime pas mes paupières, je ne peux pas les maquiller comme ca j'en suis sure elles sont trop petites. j'aimerais avoir des conseils à savoir comment mettre mon ombre à paupiere. je peux vous envoyer une photo de moi pour celle qui aimerait bien m'aider.
merci
c'est de toute beauté, mais moi je n'aime pas mes paupières, je ne peux pas les maquiller comme ca j'en suis sure elles sont trop petites. j'aimerais avoir des conseils à savoir comment mettre mon ombre à paupiere. je peux vous envoyer une photo de moi pour celle qui aimerait bien m'aider.
merci
L
Lita007
Guest
Re : Transformation...
ben moi les miennes jcrois qu'elle sont trop grande on échange ???")
ben moi les miennes jcrois qu'elle sont trop grande on échange ???

priscilla.62
Nouveau Membre
Re : Transformation...
Waw, le resultat est bluffffant !!!
Naked eye
Putting in colored contacts (to me, this makes my eyes appear larger)
With the colored contacts on
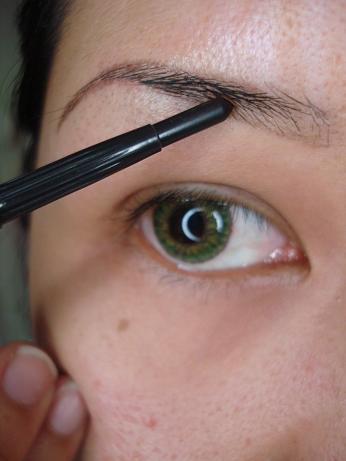
Color in only the bald areas with brow pencil in Stud
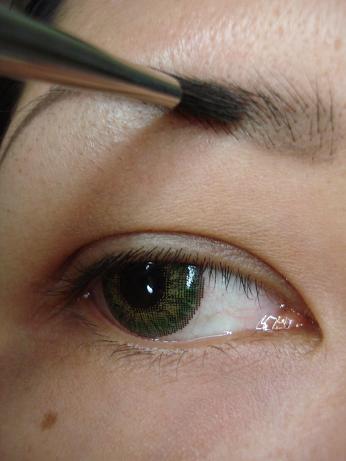
Lightly dip #208 angled brow brush into eyeshadow. I use Coquette here
Color in the rest of my brows with eyeshadow.
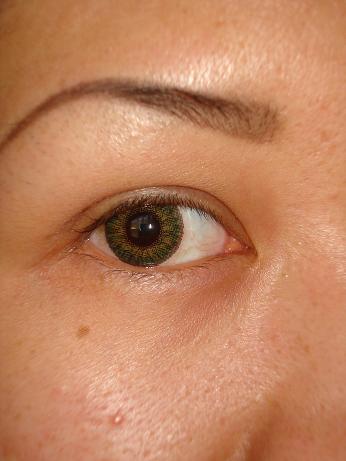
Finished brows
Apply creme foundation to eyes as a primer using #194 taklon concealer brush for the smoothest application. Follow with dusting of translucent powder
Yay! No more icky redness and dark circles!!!
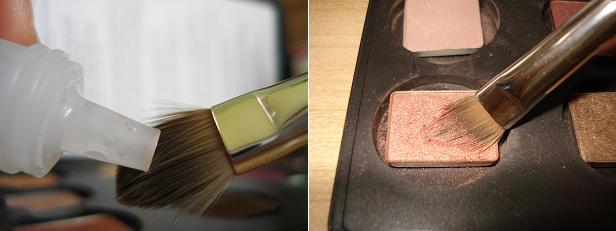
Wipe concealer brush clean and dampen with 1-2 drops of water-based mixing medium and swirl brush into Petalescent eyeshadow.
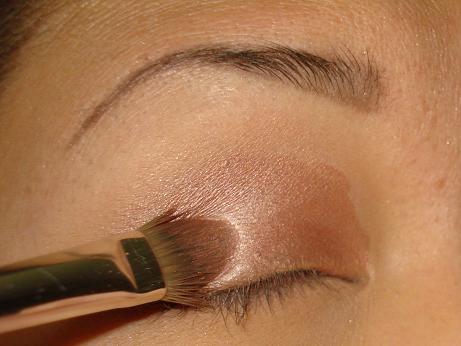
Apply all over eyes up to below browbone. This will provide the base for the rest of the eyeshadow application
Apply Goldmine eyeshadow along upper lashline up to crease using #222 tapered blending brush
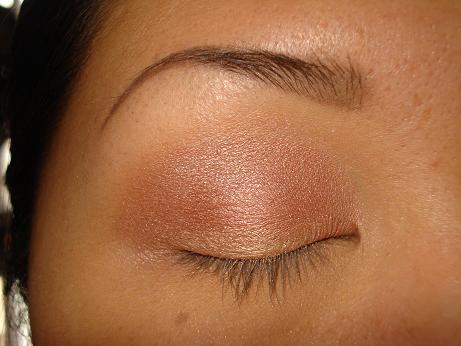
Apply Sketch eyeshadow to outer two-thirds of eye and contour into crease using #217 blending brush
Define crease and outer "V" lightly with Carbon eyeshadow using #219 pencil brush
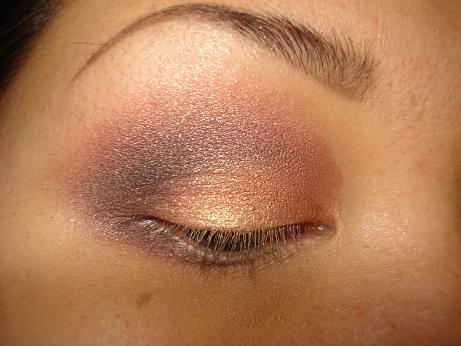
Finished eyeshadow application including Retrospeck applied to browbone and inner corner of eye using #222
Apply fluidline in Blacktrack to upper lashline using #209 eyeliner brush. I extend line 1/4 inch past outer corner of eye to create "wing"
Finished upper eyeliner product
Now with the wetline completed using the same method
Again using #219 pencil brush, dip into Carbon eyeshadow and line along bottom lashline beneath wetline
Softly line along bottom lashline beneath wetline
Finished eyeliner product. On to the lashes!!!
I use falsies most of the time. My natural lashes are pathetic. MAC's #7 are comparable to these Ardell Wispies.
Apply DUO lash adhesive along lash strip. I use the blunt end of a sewing needle to apply. Bend lash strip back and forth for 15 secs. waiting for the adhesive to become tacky
Now apply along lashline (THIS TAKES PRACTICE!). I hold the lash ends in place with my fingers until they're dry enough otherwise they'll lift out of place.
Finished lashes. My natural lashes can never look like this no matter how much mascara I use.
Just for fun I decided to put on bottom lashes applied the same way as upper lashes along the bottom lashline. These are placed beneath your natural lashes. I used MAC #25
My finished eyes (*EDIT: I should've tightlined my upper lashline!!!)
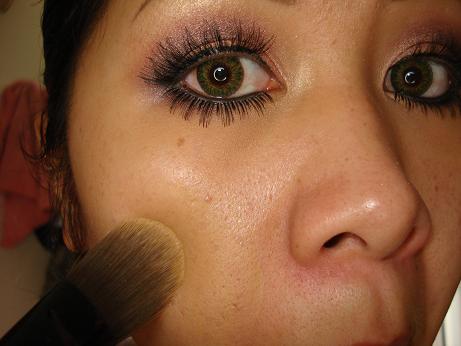
Foundation time! I apply extra spot coverage only where I need it using MAC's Full Coverage Foundation and #190 foundation brush.
My cheeks and around my nose where I have prominent redness, acne scarring, and enlarged pores is where I apply extra coverage only.
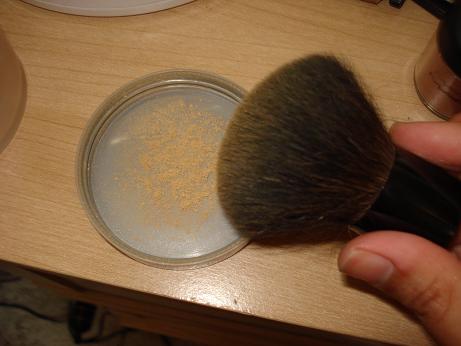
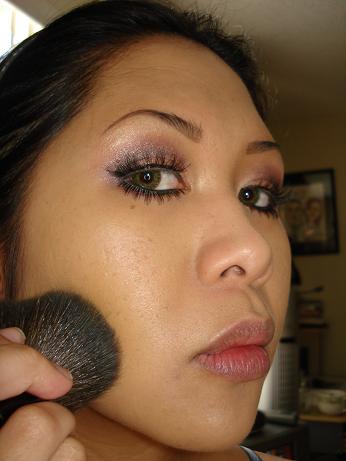
Next I use Everyday Minerals in the Intensive formula to the rest of my face
Buff it into skin with #182 kabuki/buffer brush using circular motions throughout the face for sheer coverage and to even out skin tone
A clear and even skin tone sure makes me happy!!!
On to rosy cheeks. Dip #116 blush brush into powder blush. I use Milani's Powder Mosaic in Honey Kissed
SMILE! Apply to apples of cheeks sweeping up to temples
Next apply highlighter to the tops of the apples of the cheek with the #188 small duo fibre brush dipped into Mineral Skin Finish in Shimpagne as highlighter
Now I'm officially blushing and glowing!
Facial contouring: I use a Milani's Powder Bronzer in Radiant several shades darker than my skin tone applying with angled contour brush such as the #168 large angled contour brush
Apply along jawline to minimize the "double-chin" look, and into hollows of my cheeks to simulate cheekbones
Next I contour my nose to define a bridge inbetween my eyes and narrow down my wide nose by applying contour to the sides of my nostrils. I use any regular medium eyeshadow brush for this. Remember to blend edges of all contouring well!!!
Apply Politely Pink lipstick sheerly onto lips. My lips are prominent enough on its own with or without coloring
Finally, set entire look with loose powder swirling #187 duo fibre brush into translucent powder
Apply all over face
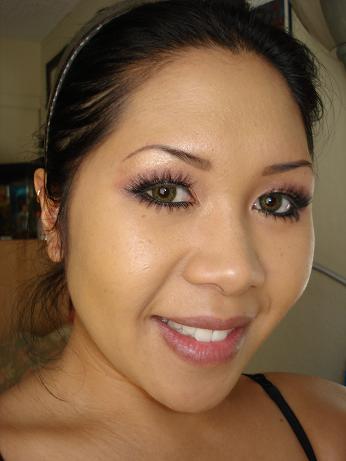
Yay! I'm finally done!!!
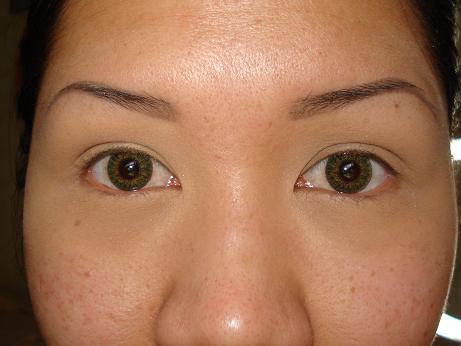
My finished pair of eyes
The classic "looking down" pose to show off my makeup application
My finished face polished up with a bit of Photoshopping, hah! Scroll back to the top to see my previous hideousness!!!
Waw, le resultat est bluffffant !!!